Many of you who follow me on social media have heard that I acquired a drum scanner about a year ago. I spent much of the last year learning how to properly wet mount film and operate this beast of a machine. Now after scanning about a hundred sheets I now have some results to share!
What is a drum scanner and why should I care?
For us large format photographers there are really just a few options when it comes to digitizing our beautiful sheets of film: Flatbed scanners like the Epson v700/750 or v800/850, a few very expensive dedicated scanners like the Hasselblad Flextight, or a drum scanner. There are many types of drum scanners out there, but they follow a similar process in that the film must be wet mounted to a drum and then placed in the scanner. Once in the scanner the drum spins at a high speed and the scanner reads just a very tiny portion of the film on each rotation, taking in the visual info in an analog fashion through vacuum tubes and other mysterious technology before converting the data from the three color channels into a digital file. The end result is a scan with incredible resolution, detail, and dynamic range to work with. The wet mounting is supposed to help with light transfer through the film and also significantly reduces dust, scratches and other imperfections.
6x17cm slides wet mounted on the scanner drum.
Tango Drum scanner with PowerMac hiding behind monitor on filing cabinet
I ended up with a Heidelberg Tango drum scanner. This scanner is pictured at left tucked away into the corner of my "office" and stands about as tall as me. It also weighs in at 550 pounds of solid metal! As you can see, a drum scanner takes some commitment when it comes to finding space for it and getting it set up.
When searching for a scanner it's usually a matter of what you can actually find, along with what machines can still be serviced. There's a guy named Karl Hudson who is dedicated to keeping these scanners alive as long as possible so that was a deciding factor when acquiring this machine. It turns out mine was lightly used and previously owned by Playboy, leaving a little to the imagination of what images have spun around on this drum.
Most drum scanners will take outdated computer interfaces like SCSI instead of modern USB connections, which usually means you need an older computer to use it. Like, much older. On top of that the software is usually designed for only one generation of a particular old computer, quite commonly a PowerMac or something similar. Despite having to use an ancient computer and spending some time figuring out how to operate such old software, they typically run quite smoothly. The software was designed to run on such old machines (state-of-the-art at the time) and overall it doesn't really lag and works just fine. It just has a bit more of a learning curve than most modern imaging software.
Enough talk, show me some scans!
Ok, let's jump into it. I have been scanning 4x5 sheets on an Epson v700 for about a decade now, and as my skill and printing needs grew as a photographer I figured I had outgrown that consumer model of scanner. Don't get me wrong, those Epsons are honestly great machines and do a fantastic job for us large format guys. They do struggle a bit more when it comes to medium format and particularly 35mm, but for 4x5 and up they are all that most of us will ever need. What I want to show here is some of the differences that are immediately noticeable between the two scanners. Not a bunch of numbers and specs, but real visual comparisons that come through both on a monitor and in a large scale print. I've selected a number of images that I've happened to scan on both scanners, both color negative and positive.
Sharpness
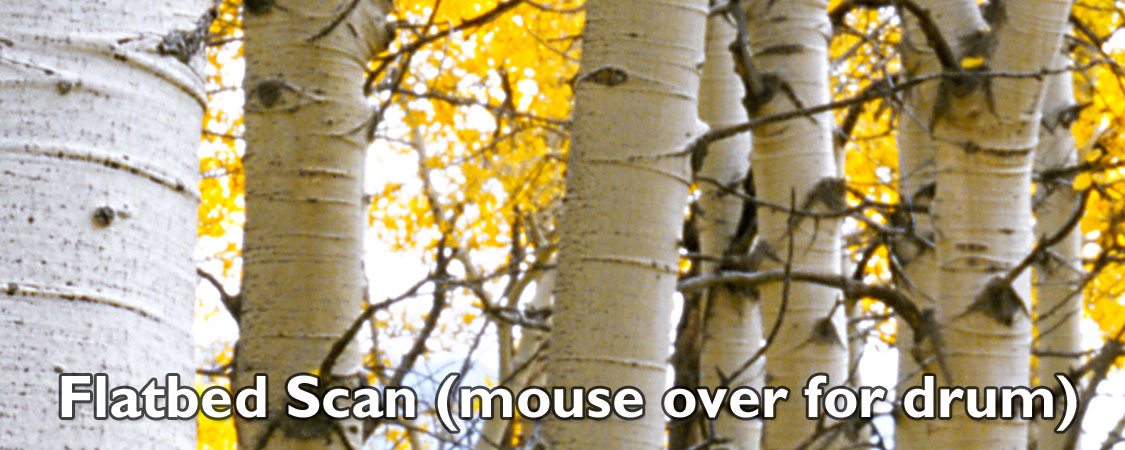
Probably the part everyone thinks about most when it comes to making higher-end scans. I certainly was excited about the idea of making much larger enlargements and it's wonderful to see 4x5 sheets represented in a 5 foot long print. There's a couple of different ways I'll show you the difference in sharpness, starting with a sheet of Velvia 100 from last autumn.
It's not hard to easily see a difference between the two when it comes to sharpness. Both of these scans are unsharpened scans. A comparison is a bit tricky because the drum scan was done at a much higher resolution (4000dpi vs 2400dpi on the Epson), but even though the Epson claims to do resolutions up to 6400dpi it's very unlikely that you'll see much beyond 2400 or perhaps 3200 aside from unnecessarily increased file size. The Epson just isn't really capable of resolving all the grain detail. To make the images similar in size I tried both scaling down the drum scan to match the flatbed and scaling up the flatbed to meet the resolution of the drum scan - either way the side-by side results look rather similar and there's no real use in debating the drum scanner's ability to out-resolve a consumer flatbed.
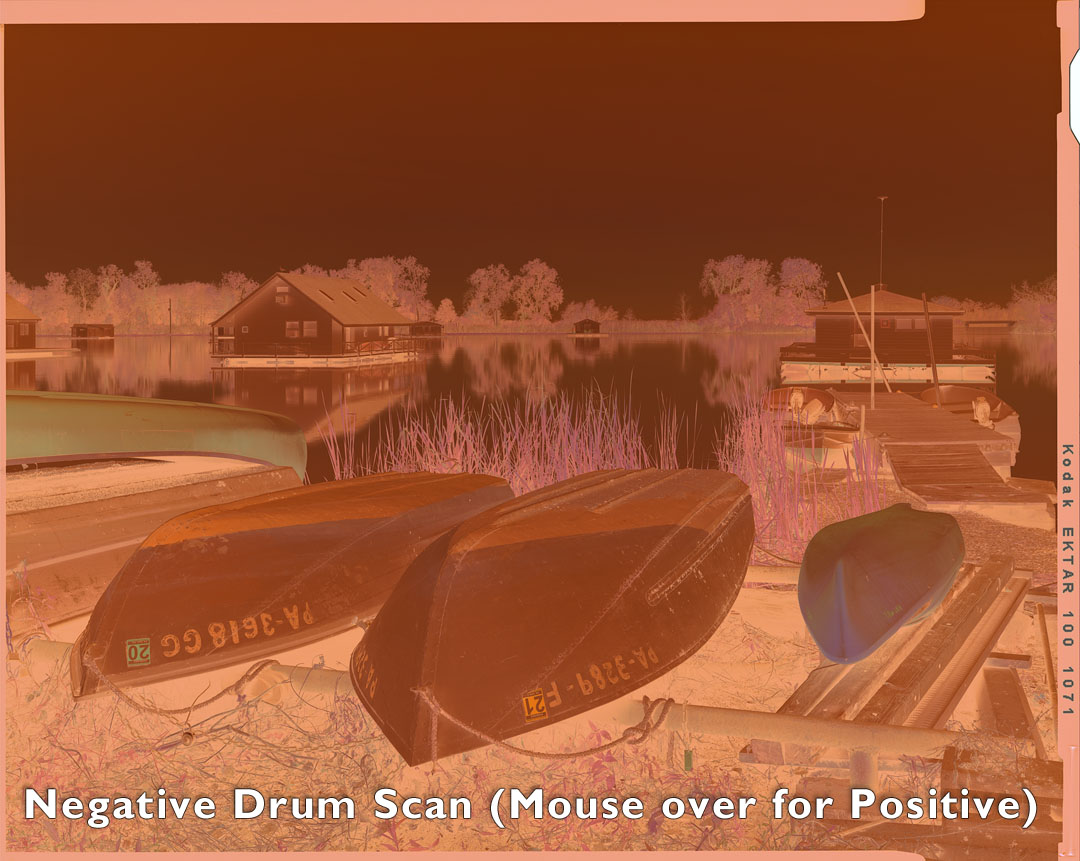
The last example was a sheet of slide film, where drum scanners really excel. Next I will show a comparison between two scans of a sheet of Kodak Ektar, a color negative film. The difference is perhaps a little more subtle on the negative film so I will be displaying this comparison as a mouse-over.

"Kebler Gold" - The full image that the comparison shot above is from
Again it's still obvious that the drum scan is sharper on this sheet of Ektar, but it's easy for the grain detail to get carried away on negative scans. Fortunately, drum scanners have an aperture control that can sharpen or smooth out the grain structure and after a year of experience I've found it looks best to be more aggressive with resolving all the grain detail on slide film and a little more reserved when it comes to negatives.
I'm going to show one more comparison of sharpness and grain detail, this time on a 6x4.5cm slide and showing more open sky so you can see the actual film grain. In the drum scan below you will see a huge difference in grain and sharpness, with the scan on the right revealing much more details in the ladder running up the windmill. You will also notice that the image on right possibly appears too grainy. For this scan I cranked the aperture on the drum scanner all the way down to resolve the most grain detail. While it improves overall sharpness of the smaller format film (I typically shoot 4x5), it will make the grain more noticeable. In the future I don't think I'll crank it down this far but you'd actually be surprised how the additional grain detail is no where near as obnoxious when it comes to a real print which is always my final goal. Grain looks much different on a computer monitor.
Detail of sky and a windmill. Notice how much more the lightning bolt stands out in the drum scan, along with the details on the ladder running up the windmill.
One thing worth noting is that with all the additional grain detail I've found it very challenging to do any additional sharpening to a drum scan before print. Since the grain is smoothed out on the Epson scans and virtually unresolved, you can sharpen a flatbed scan significantly to increase details in this image, (or in grasses, trees, etc) without introducing a lot of noise. You still can't reach the detail level of a drum scan, but you can improve the flatbed image without unwanted artifacts.
Improvements in Image Tonality
Here's where the drum scanner really starts to shine. The increase in overall image tonality and shadow detail (on slides) is astounding. These differences can also be challenging to show because no matter what type of scanner you use it's important to also edit the image afterwards. Even a drum scan needs curves or levels adjustments after scanning to set correct white and black points, correct the colors, and adjust the contrast. Even when you make a scan you are likely to have the scanning software make some corrections to these things so that you scan is somewhat closer. Remember, a scanner is not an artist and it has no idea what you have photographed. It doesn't know that it was a sunrise, or a snow scene, or perhaps a tungsten lit night scene. These are things you have to correct after the scan no matter what. With that out of the way, I'm going to try to show you some differences that I've noticed between flatbed and drum scans.
Two scans of the same 6x6 Velvia slide
Above I have a flatbed and drum scan of the same 6x6 slide from the Wind River Range. Both of these are basic, uncorrected scans just as they were when I opened them in Photoshop. Immediately you can tell a massive difference between the two with the drum scan being a far better starting point and already looking much closer to the slide on a light table than the other. The biggest benefits to me were the increased shadow detail in the rocks at the bottom, and the improvement of highlight detail with the sky remaining blue even at the brightest point just above the peaks. I never did edit this particular slide on the flatbed scan because I found the detail in the rocks to be completely lost and far too muddy. I counted it as a loss and used another image with a different composition - until I got the drum scanner.
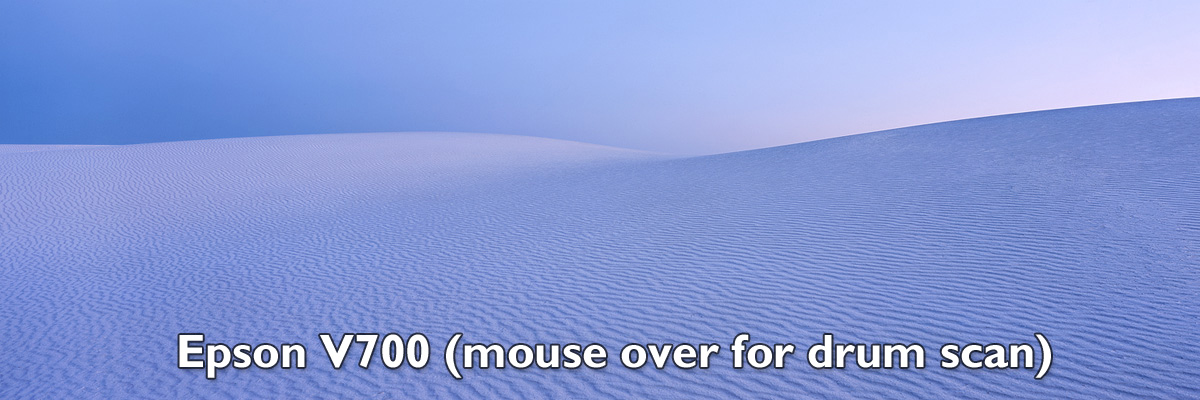
Next I want to show another comparison of the tonal differences with a very minimal 6x17 slide (Provia) from White Sands. A mouse-over comparison should be the most useful here.

People have always talked about the ability that drum scanners have to pull out more shadow details on slides, but I have been equally impressed by the improvements in the highlights especially as it nears the details that would be clipped on a flatbed scan. When you mouse over and look at the difference between the scans above you can easily see how much more color was retained in the sky on the right which looks much more like the slide on a light table. Those subtle red twilight hues really change the feel of the image. On top of that you can see a lot of banding in the gradient from light to dark sky in the Epson scan that is not noticeable in the Tango. All of the subtleties are much smoother in the drum scan.
Color Negative Film
It’s often said that drum scanners really shine when it comes to slide film and not so much with negatives, but I beg to differ. Color negatives have become a huge part of my personal workflow and the drum scanner truly excels at recreating all the color tones of the film as well as every grain of detail. On top of that, it’s required mastering a manual inversion process to convert the raw negative scans to make the final positive images. It’s been quite a learning process but the knowledge gained about color negatives has been priceless. Gradients are much smoother with the drum scanner and subtleties really come through.
"Clearing Fog at Loch Vale" - Drum vs flatbed comparison
My goal with all my negative drum scans so far has been to match or slightly improve upon the colors that I had with the Epson scans. There's really no point in comparing base scans because the drums would be an inverted orange mess, but upon correcting the colors I've come to notice that the drum scans lean less toward cyan (the color that negative film loves to render skies - and one that I don't particularly like) and more towards a pleasing sky-blue tone. You can see very different colors in the water at the bottom in the above image. Besides that, you can also see some rainbow-hued banding in the top left of the Epson scan where the clouds meet the dark mountain - a problem you won't see in the Tango scans.

Mouse or tap over to see the start and finished scan from a color negative. Note the smooth gradiations in the sky and full color palette. Film is Kodak Ektar.
Overall I have been extremely happy with the results from the new scanner, especially when it comes to actual large-scale prints. The detail difference is very noticeable once the print size gets up to 40x50" from a 4x5" sheet or even 16x20" for medium format enlargements. The tonal differences can be noticed at any print size and even web viewing.
Want to see the difference on your own film? Click here for drum scanning services.
Update: Drum Scanning Services Price List
Here are the prices for me to personally scan your film. Images will be provided in 16 bit lab color mode as this is the "raw" full-quality settings for the Tango drum scanner and NewColor software. Resolution varies based on the format as the scanner is capable of a maximum of 16000 pixels per rotation, meaning that you can get a higher dpi scan out of smaller formats. Files can be transferred to you via Google Drive or you can supply a USB drive. Prices are as listed below, please check my drum scanning page for the latest information.
35mm at 8k dpi - $30 per image - file size about 600MB, no sprockets
645, 6x6, or 6x7 at ~ 5k dpi - $40 per image - file size varies
6x12cm at ~ 5k dpi - $50 per image - file size about 1.5 gigs
6x17cm at ~ 5k dpi - $60 per image - file size about 2.2 gigs
4x5” at 4k dpi - $60 per sheet - About a 1.7 gig file
8x10” at 2k dpi - $120 per sheet - About a 1.7 gig file
Turnaround time varies depending on my schedule. Email me at alex@alexburkephoto.com if you would like to have your film scanned.
For those who like to see things in video format, here’s a quick one for you:
Did you enjoy this blog post? Feel free to make a small donation. By clicking the button below, you can give me a $5 donation easily through PayPal (no account needed) that helps me greatly. Every sheet of my large format film costs about $5 so your donation can keep me out there photographing the beautiful landscape!
Better yet, pick up a copy of my new ebook: "Film in a Digital Age" and learn everything I know about film photography.


